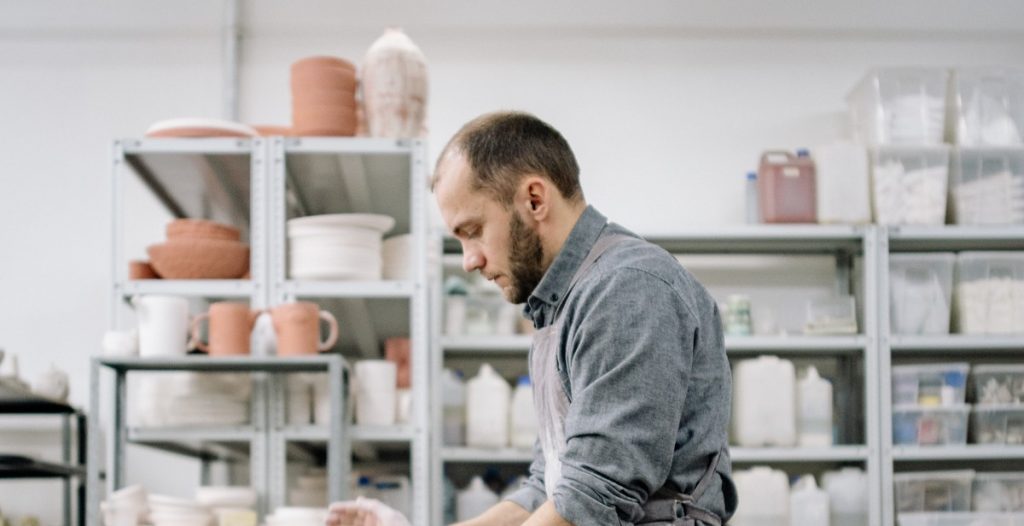
Introduction: Importance of Custom Candle Designs
Candles have been a part of human life for centuries. They have been used for lighting, religious ceremonies, and even as a symbol of celebration. Over the years, the art of candle making has grown and evolved, and now there are countless options available to create custom candle designs that suit any occasion or mood.
Custom candle designs have become increasingly popular as people seek unique and personalized items for their homes or as gifts. They offer a way to express creativity, set a mood, or add a special touch to any space. Creating custom candle designs is also a great way to start a small business or add extra income to an existing one.
The Benefits of Creating Custom Candle Designs
There are many benefits to creating custom candle designs. Firstly, it allows you to express your creativity and create something truly unique. You can experiment with different colors, scents, and molds to create candles that match your personal style or the style of your customers.
Custom candle designs also offer a way to stand out in a crowded market. With so many candle options available, offering something unique and personalized can help your business attract and retain customers.
The Role of Molds in Custom Candle Design
Molds play a crucial role in creating custom candle designs. They come in a variety of shapes and sizes, allowing you to create candles that range from traditional to modern and everything in between. Using molds also ensures that your candles are consistent in size and shape, making them more visually appealing and easier to package and sell.
Overall, custom candle designs offer a way to express creativity, add a personal touch to any space, and create a unique business opportunity. With the right molds and techniques, anyone can create stunning custom candles that are sure to impress.

Types of Candle Molds
When it comes to creating custom candle designs, choosing the right mold is essential. There are several types of candle molds available in the market, each with its unique features and benefits. Here are the most common types of candle molds:
Pillar Molds
Pillar molds are perfect for creating cylindrical or square-shaped candles. They are usually made of metal, plastic, or silicone and come in various sizes and shapes. Pillar molds can be used for both scented and unscented candles and are ideal for creating long-lasting candles.
Votive Molds
Votive molds are small, cylindrical molds that are perfect for making votive candles. Votive candles are small, usually around 2 inches tall and 1.5 inches in diameter. Votive molds can be made of metal, plastic, or silicone and are perfect for creating small, scented candles that burn for several hours.
Tealight Molds
Tealight molds are small, circular molds that are perfect for making tealight candles. Tealight candles are small, usually around 1.5 inches in diameter and burn for several hours. Tealight molds can be made of metal or plastic and are perfect for creating small, scented candles.
Container Molds
Container molds are used to create candles in containers such as jars or tins. These molds can be made of metal, plastic, or silicone and come in various shapes and sizes. Container molds are perfect for creating scented candles that can be easily transported and used as decorative items.
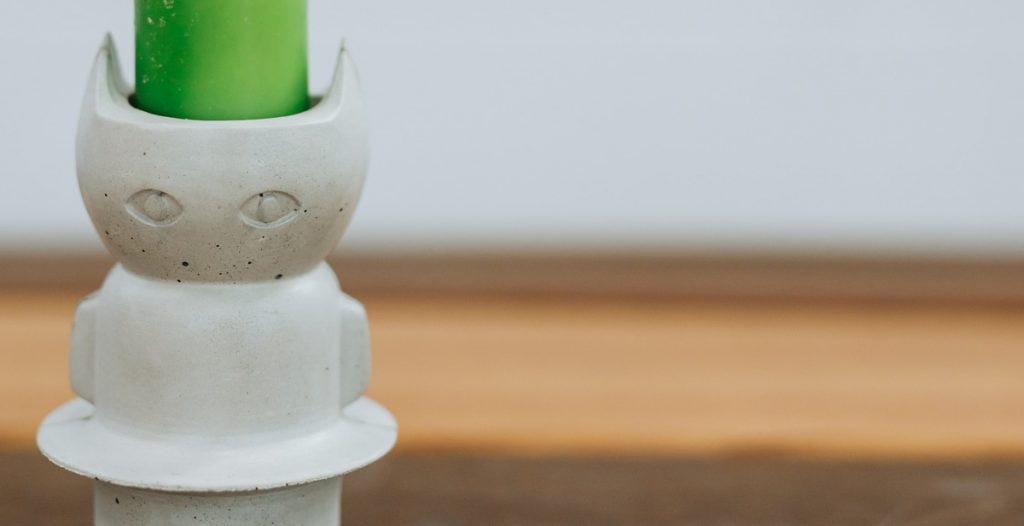
Specialty Molds
Specialty molds are molds that come in unique shapes and sizes, such as animal-shaped molds or holiday-themed molds. These molds can be made of metal, plastic, or silicone and are perfect for creating unique and decorative candles.
| Mold Type | Material | Shape | Uses |
|---|---|---|---|
| Pillar Molds | Metal, plastic, or silicone | Cylindrical or square | Creating long-lasting candles |
| Votive Molds | Metal, plastic, or silicone | Small, cylindrical | Creating small, scented candles |
| Tealight Molds | Metal or plastic | Small, circular | Creating small, scented candles |
| Container Molds | Metal, plastic, or silicone | Various shapes and sizes | Creating scented candles in containers |
| Specialty Molds | Metal, plastic, or silicone | Unique shapes and sizes | Creating unique and decorative candles |
Choosing the right candle mold can greatly affect the outcome of your candle design. Consider the size, shape, and material of the mold before making your selection. With the right mold, you can create beautiful, unique, and long-lasting candles.

Materials Required
1. Wax
The first and most important material required for creating custom candle designs is wax. You can choose from a variety of waxes such as paraffin wax, soy wax, beeswax, or palm wax. Each wax has its own unique characteristics, so make sure to choose the one that best suits your needs. You can purchase wax in blocks, flakes or pellets depending on your preference.
2. Wicks
Wicks are another important material required for creating custom candle designs. You can choose from a variety of wicks such as cotton wicks, wooden wicks or eco wicks. The size of the wick will depend on the diameter of the candle you are making. Make sure to choose the right wick size to ensure proper burning of your candle.
3. Dyes
Dyes are used to add color to your candles. You can choose from a variety of colors and shades to create your desired design. Dyes are available in liquid or powder form, so make sure to choose the one that best suits your needs.
4. Fragrances
Fragrances are used to add scent to your candles. You can choose from a variety of fragrances such as lavender, vanilla, or citrus. Fragrances are available in liquid or oil form, so make sure to choose the one that best suits your needs.
5. Tools
Tools are required to help you create your custom candle designs. You will need a double boiler to melt your wax, a thermometer to monitor the temperature, a pouring pot to pour the wax, a stirring spoon to mix the wax, and a mold to shape your candle. You can also use a variety of other tools such as a wick holder, a wick trimmer, and a heat gun to help you create your desired design.
Conclusion
With these materials and tools, you can create beautiful custom candles in a variety of shapes, sizes, and colors. Make sure to choose the right materials and tools to ensure that your candles turn out just the way you want them to.

Step-by-Step Guide for Creating Custom Candle Designs Using a Variety of Molds
Preparing the Mold
The first step in creating custom candle designs is to prepare the mold. This involves cleaning the mold and ensuring that it is free from any debris or residue from previous use. To do this, you can use soap and water or rubbing alcohol to clean the mold thoroughly. Once the mold is clean, you can apply a release spray to ensure that the candle will easily come out of the mold once it has hardened.
Melting the Wax
The next step is to melt the wax. You can use a double boiler to melt the wax or a wax melting pot. Make sure to use a thermometer to ensure that the wax is heated to the correct temperature. The ideal temperature for melting wax is between 160°F and 180°F.
Adding Dyes and Fragrances
Once the wax has melted, you can add dyes and fragrances to the mixture. Make sure to stir the wax thoroughly to ensure that the dyes and fragrances are evenly distributed throughout the mixture.
Inserting the Wick
The next step is to insert the wick into the mold. Make sure that the wick is centered in the mold and that it is secured in place using a wick holder or a piece of tape.
Pouring the Wax
Once the wick is in place, you can start pouring the wax into the mold. Make sure to pour the wax slowly and evenly to avoid any air bubbles forming in the mixture. Leave a small amount of space at the top of the mold to allow for any shrinkage that may occur as the wax cools.
Removing the Candle from the Mold
Once the wax has cooled and hardened, you can remove the candle from the mold. To do this, gently tug on the wick until the candle comes loose from the mold. You can then trim the wick to the desired length and enjoy your custom candle design!
| Step | Description |
|---|---|
| 1 | Prepare the mold by cleaning it and applying a release spray. |
| 2 | Melt the wax using a double boiler or a wax melting pot. |
| 3 | Add dyes and fragrances to the melted wax and stir thoroughly. |
| 4 | Insert the wick into the mold and secure it in place. |
| 5 | Pour the wax slowly and evenly into the mold. |
| 6 | Leave the wax to cool and harden before removing the candle from the mold. |

Tips and Tricks for Creating Custom Candle Designs
Creating custom candle designs is a fun and rewarding hobby that allows you to express your creativity and create unique gifts for friends and family. Here are some tips and tricks for making your candles stand out:
Mix and Match
Don’t be afraid to mix and match different colors and fragrances to create unique and interesting combinations. Experiment with different combinations until you find the perfect blend.
Experiment with Colors
Use a variety of colors to create eye-catching candles. You can use traditional candle dyes or experiment with natural ingredients like beet juice, turmeric, or coffee grounds to create unique colors.
Try Different Fragrances
Incorporating different fragrances into your candles can create a unique and memorable experience. Experiment with different essential oils or fragrance oils to create your own custom blends.
Use Unconventional Molds
Try using unconventional molds to create unique candle shapes. You can use silicone molds, mason jars, or even seashells to create interesting designs. Be creative and have fun!
Final Thoughts
Creating custom candle designs is a fun and rewarding hobby that allows you to express your creativity and create unique gifts for friends and family. By following these tips and tricks, you can create candles that stand out and make a lasting impression.

Conclusion
Creating custom candle designs can be a fun and rewarding hobby or business venture. By utilizing a variety of molds, you can create unique and personalized candles that stand out from the crowd.
Whether you are a beginner or an experienced candle maker, there are many different types of molds available to suit your needs. From silicone to metal, there is a mold for every type of candle design.
When choosing your molds, consider the type of wax you will be using and the size and shape of your desired candle. It is also important to experiment with different colors, scents, and additives to create truly one-of-a-kind candles.
By following the tips and techniques outlined in this article, you can create beautiful and custom candle designs that are sure to impress. Remember to always follow safety precautions when working with hot wax and to have fun with your creations!
Thank you for reading and happy candle making!
Key Takeaways
- Custom candle designs can be created using a variety of molds.
- Choose molds based on the type of wax you will be using and the desired size and shape of your candle.
- Experiment with different colors, scents, and additives to create unique candles.
- Always follow safety precautions when working with hot wax.
Additional Resources
For more information on candle making, check out the following resources:
| Item | Price | Where to Buy |
|---|---|---|
| Wax | $20 | Amazon |
| Molds | $15 | Michael’s |
| Fragrance Oils | $10 | Candle Science |
| Wicks | $5 | Joann’s |