Introduction: How do you make candles with wooden wicks?
Candles have been an essential part of human life for centuries. They are used for various purposes, from lighting up a room to creating a romantic ambiance. However, with the rise of eco-friendly and sustainable products, traditional candles made with paraffin wax and cotton wicks are being replaced by natural alternatives. One such alternative is candles made with wooden wicks.
Why Wooden Wicks?
Wooden wicks have several advantages over cotton wicks. They create a soft, crackling sound when burned, which adds to the overall ambiance of the candle. They also burn slower and produce less soot than cotton wicks. Additionally, wooden wicks are eco-friendly and sustainable, as they are made from natural materials such as cherry, maple, and birch wood.
Creating candles with wooden wicks may seem daunting, but it is a straightforward process that can be done at home with just a few supplies. In this article, we will guide you through the step-by-step process of making candles with wooden wicks, including selecting the right materials, preparing the wax, and setting the wick.
So, let’s get started on making your own eco-friendly and sustainable candles with wooden wicks!

Materials Needed to Make Candles with Wooden Wicks
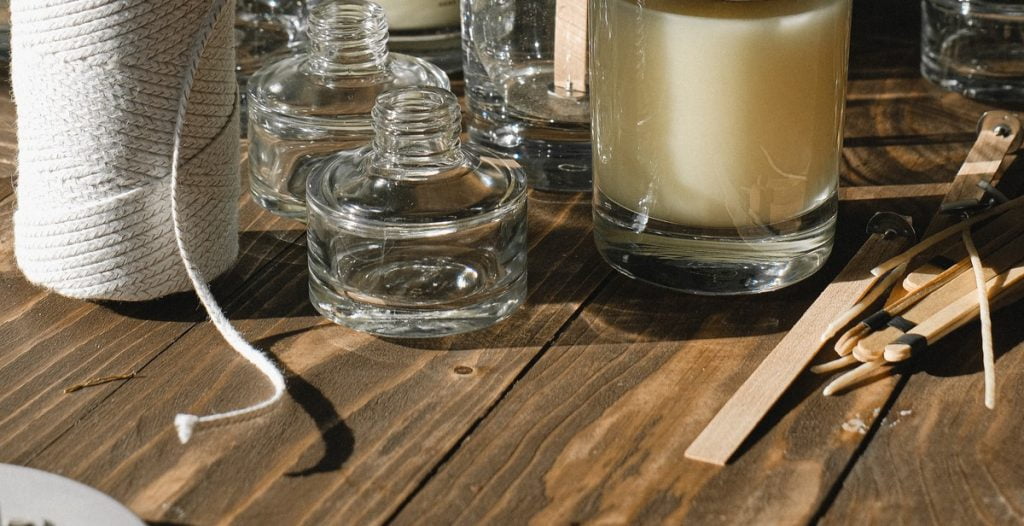
Making candles with wooden wicks is a fun and creative activity that can be enjoyed by anyone. To get started, you will need the following materials:
1. Wax
The first and most important material you will need is wax. You can choose from a wide variety of waxes, including soy wax, beeswax, paraffin wax, and more. Make sure to choose a wax that is suitable for your specific needs and preferences.
2. Wooden Wicks
Wooden wicks are the next essential ingredient in making candles with wooden wicks. They come in various sizes, shapes, and types, so choose the one that suits your candle’s size and container.
3. Container
You will also need a container to hold your candle. Mason jars, glass containers, and metal tins are popular choices for candle containers. Make sure the container is clean, dry, and heat-resistant.
4. Wick Clips
Wick clips are used to hold the wick in place while the wax is poured into the container. They are available in various sizes and types, so choose the one that matches your wick size.
5. Fragrance Oil
If you want scented candles, you will need fragrance oil. Choose a fragrance oil that suits your preferences and is suitable for candle-making.
6. Color Dye
If you want to add color to your candles, you will need color dye. Choose a color that matches your preference and is suitable for candle-making.
7. Double Boiler
A double boiler is used to melt the wax. You can use a makeshift double boiler by placing a heat-resistant bowl over a pot of boiling water.
8. Thermometer
A thermometer is used to monitor the wax’s temperature. It is essential to ensure that the wax is not too hot or too cold when pouring it into the container.
Conclusion
Now that you know the materials needed to make candles with wooden wicks, you can start your candle-making journey. Remember to take safety precautions and follow the instructions carefully to ensure a successful and enjoyable candle-making experience.

Step by Step Instructions: How do you make candles with wooden wicks?
Preparing the Container
The first step in making candles with wooden wicks is to prepare the container. Choose a container that is suitable for the size of the candle you want to make. Clean the container thoroughly and dry it completely.
Melt the Wax
The next step is to melt the wax. Use a double boiler to melt the wax. Heat the wax to the desired temperature, usually around 180-185°F for soy wax. Stir the wax occasionally until it is completely melted.
Adding Fragrance Oil and Color Dye
Once the wax is melted, add fragrance oil and color dye. The amount of fragrance oil and color dye to add depends on the size of the candle and personal preference. Stir the wax thoroughly to ensure the fragrance and color are evenly distributed.
Preparing the Wooden Wick
While the wax is melting, prepare the wooden wick. Measure the length of the wick, ensuring it is long enough to reach the bottom of the container. Soak the wick in the melted wax for at least 10 minutes. This will help the wick stick to the bottom of the container.
Attaching the Wick to the Container
After the wick has soaked, remove it from the wax and straighten it. Attach the wick to the center of the container using a wick holder or glue dots. Ensure that the wick is straight and centered.
Pouring the Wax
Once the wick is attached, it is time to pour the wax into the container. Pour the wax slowly and steadily, ensuring that the wick remains centered. Leave a small gap at the top of the container to allow for the wax to settle.
Trimming the Wick
After the wax has cooled and solidified, trim the wick to approximately ¼ inch. This will ensure that the wick burns evenly and does not produce excessive smoke.
Conclusion
By following these simple steps, you can make beautiful candles with wooden wicks. Experiment with different fragrances and colors to create unique and personalized candles.

Tips and Tricks for Making Candles with Wooden Wicks
Wooden wicks have become a popular choice for candle makers in recent years. They offer a unique crackling sound and rustic aesthetic that cannot be achieved with traditional cotton wicks. However, making candles with wooden wicks requires a few adjustments to ensure a successful burn. Here are some tips and tricks to help you make the perfect wooden wick candle.
Choosing the Right Wooden Wick
The first step in making a wooden wick candle is choosing the right wick. Wooden wicks come in different shapes and sizes, and the type of wax and jar you use will determine which wick is best for your candle.
A general rule of thumb is to choose a wick that is roughly one size larger than the diameter of your jar. For example, if your jar is 3 inches in diameter, choose a wick that is meant for a 3.5-inch jar.
It is also important to consider the type of wax you are using. Soy wax tends to require a larger wick size than paraffin wax because it has a lower melting point. Be sure to test different wick sizes to find the perfect match for your wax and jar combination.
Wick Size Matters
Using the correct wick size is crucial for a successful burn. If the wick is too small, it will not create a large enough melt pool, and the candle will tunnel down the center, leaving unused wax on the sides. If the wick is too large, the flame will be too big, and the candle will burn too quickly.
To avoid tunneling, make sure the melt pool reaches the edges of the jar on the first burn. This will ensure that the wax is used evenly and prevent tunneling in future burns.
Avoiding Tunneling
Tunneling can also be prevented by trimming the wick before each burn. The ideal length for a wooden wick is 1/8 to 3/16 of an inch. If the wick is too long, it will create a large flame, which can cause the candle to burn unevenly and produce smoke.
It is also important to keep the candle away from drafts, which can cause the flame to flicker and burn unevenly.
Conclusion
Making candles with wooden wicks can be a fun and rewarding experience. By following these tips and tricks, you can create beautiful and long-lasting candles that will fill your home with a warm and cozy ambiance.

Conclusion
Making candles with wooden wicks is a fun and creative process that can result in beautiful and unique candles. By following the steps outlined in this article, you can create candles that not only look and smell great but also provide a warm and cozy ambiance in your home.
Remember to choose high-quality materials, including wooden wicks, wax, fragrance oils, and containers, to ensure your candles burn evenly and safely. Additionally, experiment with different wick sizes and types of wax to find the perfect combination for your desired burn time and scent throw.
Whether you’re making candles as a hobby or as a business venture, there are many resources available to help you perfect your craft. From online tutorials to local workshops, there are endless opportunities to learn and grow as a candle maker.
So go ahead and get creative with your candle-making! With a little practice and experimentation, you can create beautiful and unique candles that will bring warmth and joy to your home or to others as thoughtful gifts.