How do you create candles that are shaped like specific objects or symbols?
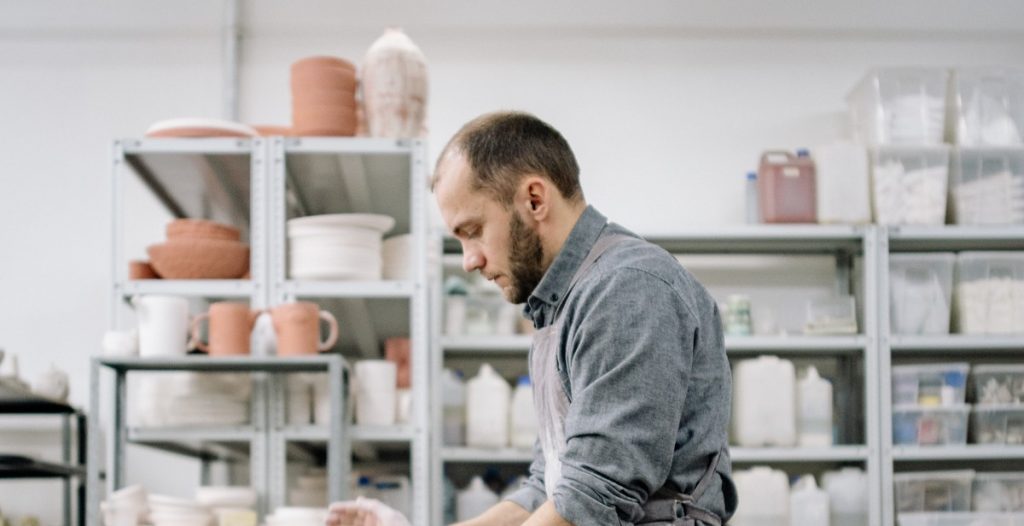
Candles have been used for centuries for various purposes, including lighting, decoration, and religious and spiritual ceremonies. Over time, candle making has evolved, and today, there are a variety of candles available in different shapes, sizes, and colors. One popular type of candle is shaped candles.
What are shaped candles?
Shaped candles are candles that are molded into specific shapes or designs, such as animals, fruits, flowers, and symbols. These candles are often used for decorative purposes, and they add a unique touch to any space.
Why create shaped candles?
Creating shaped candles can be a fun and creative process, and it allows candle makers to showcase their skills and imagination. Shaped candles can also be used as personalized gifts for special occasions, such as weddings, birthdays, and holidays. Additionally, shaped candles can be used for various events, including themed parties, corporate events, and religious ceremonies.
Creating shaped candles requires a combination of skills, including candle making, sculpting, and painting. In the following sections, we will discuss in detail the steps involved in creating candles that are shaped like specific objects or symbols.

Materials needed for making shaped candles
Making shaped candles requires specific materials that are different from those used in making regular candles. Here are the materials you will need:
Wax
The wax used in making shaped candles should be of high quality, and it should be able to hold its shape when it cools. Paraffin wax is the most commonly used wax for making shaped candles. It is easy to work with and comes in different melting points depending on the size and shape of the candle you want to make. Soy wax and beeswax are also great options for making shaped candles.
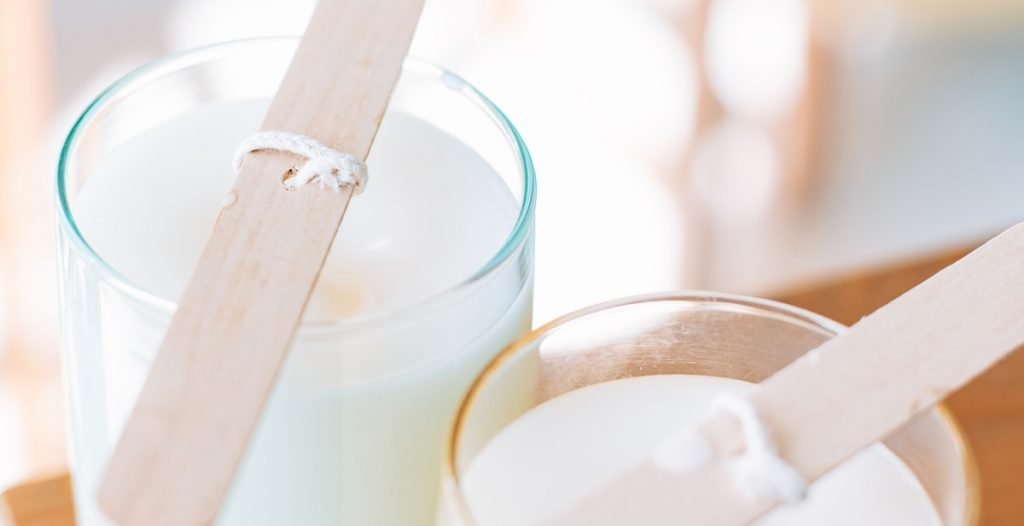
Wick
Wicks are an essential component of any candle, including shaped candles. The wick you choose should be the right size for the candle you want to make. If the wick is too small, the candle will not burn properly, and if it is too large, the candle will burn too fast. You can choose from different types of wicks depending on the wax you are using and the size of the candle.
Mold
The mold you choose will determine the shape of your candle. You can use silicone molds, metal molds, or plastic molds, depending on the shape you want. Silicone molds are the best option for making detailed and intricate shapes, while metal molds are ideal for making larger candles. Plastic molds are affordable and easy to find, but they are not as durable as silicone or metal molds.
Coloring and fragrance
Coloring and fragrance are optional but can enhance the aesthetic and sensory experience of your shaped candles. You can add dyes or pigments to the wax to create different colors, and you can add fragrance oils to make scented candles. Make sure you use candle-safe coloring and fragrance oils to avoid any safety hazards.
Other materials
Other materials you may need for making shaped candles include a double boiler or a melting pot, a thermometer, a stirring tool, and a heat-resistant surface to work on.
| Materials | Uses |
|---|---|
| Wax | To hold the shape of the candle when it cools |
| Wick | To burn the candle |
| Mold | To give the candle its shape |
| Coloring and fragrance | To enhance the aesthetic and sensory experience of the candle |
Now that you know the materials you need, it’s time to start making your shaped candles. Follow the instructions carefully and be patient, and you will have beautiful and unique candles that will impress everyone.

Steps to create shaped candles
Creating shaped candles is a fun and creative way to add a personal touch to your home decor or gift-giving. By following these simple steps, you can easily create candles that are shaped like specific objects or symbols.
Step 1: Choose a mold
The first step in creating shaped candles is to choose a mold that matches the shape you want your candle to be. You can find a variety of molds at craft stores or online, including silicone, metal, or plastic molds in different shapes and sizes.
Step 2: Prepare the mold and wick
Once you have your mold, it’s time to prepare it for the wax. First, make sure the mold is clean and dry. Then, insert a wick into the mold and secure it with a wick holder or tape. Make sure the wick is centered in the mold and extends slightly above the top.
Step 3: Melt the wax
Next, melt the wax in a double boiler or a wax melting pot. Be sure to follow the instructions on the wax package for the recommended melting temperature and time. Stir the wax occasionally to ensure it melts evenly.
Step 4: Add color and fragrance
Once the wax is melted, you can add color and fragrance to customize your candle. Use candle dye chips or liquid dye to add color to the wax. For fragrance, you can use essential oils or candle fragrance oils. Add the color and fragrance to the melted wax and stir well.
Step 5: Pour the wax into the mold
Carefully pour the melted wax into the prepared mold, filling it to the desired level. Make sure the wick stays centered as you pour.
Step 6: Allow the candle to cool and harden
Let the candle cool and harden for several hours, or until the wax is completely solid. You can speed up the process by placing the mold in the refrigerator or freezer for a short time.
Step 7: Remove the candle from the mold
Once the wax has hardened, carefully remove the candle from the mold. Gently pull on the wick to loosen the candle from the mold. If the candle is stubborn, you can place the mold in warm water for a few minutes to help release it.
Conclusion
By following these simple steps, you can create beautiful and unique shaped candles that will add a personal touch to your home decor or make a thoughtful gift for someone special. Experiment with different shapes, colors, and fragrances to create your own custom candles.

Tips for creating shaped candles
Creating shaped candles can be a fun and creative way to add a personal touch to your home décor or to give as gifts. However, it can also be a bit challenging if you’re new to candle making. Here are some tips to help you create beautiful shaped candles:
Use a double boiler to melt the wax
When making shaped candles, it’s important to melt the wax properly to ensure that it stays at the right temperature for pouring. Using a double boiler is the best way to melt wax evenly and prevent it from burning. To create a double boiler, fill a pot with water and place a heat-resistant bowl on top. Heat the water to a simmer and add the wax to the bowl. Stir occasionally until the wax is completely melted.
Add fragrance and color sparingly
When making shaped candles, it can be tempting to add a lot of fragrance and color to make them more appealing. However, too much fragrance or color can affect the quality of the candle and make it less appealing. It’s best to add fragrance and color sparingly and test the candle before making more. This way, you can adjust the amount of fragrance and color to your liking.
Choose a mold that is easy to work with
The mold you choose for your shaped candle can make a big difference in how easy it is to work with. Silicone molds are the easiest to work with since they are flexible and easy to remove the candle from. However, if you prefer a more traditional look, you can use metal or plastic molds. Just make sure that the mold is the right size and shape for your candle.
| Types of molds | Pros | Cons |
|---|---|---|
| Silicone molds | Flexible, easy to remove candle | May not give a traditional look |
| Metal molds | Durable, give a traditional look | May be difficult to remove candle |
| Plastic molds | Lightweight, easy to work with | May not be as durable |
By following these tips, you can create beautiful shaped candles that are sure to impress. Remember to be patient and take your time, and you’ll soon be creating candles that are both beautiful and functional.

Conclusion
Creating candles that are shaped like specific objects or symbols is a unique and creative way to add a personal touch to your home decor or gift-giving. With the right tools, materials, and techniques, anyone can make their own customized candles that reflect their personality and style.
Before starting, it is important to have a clear idea of the shape or symbol that you want to create. You can use a variety of materials such as silicone molds, cookie cutters, or even hand-carved molds to achieve the desired shape.
When choosing the wax, it is important to consider the melting point and hardness of the wax. Beeswax and soy wax are great options for creating detailed shapes, while paraffin wax is ideal for creating larger candles.
Adding color and fragrance to your candles can enhance their aesthetic appeal and create a more pleasant ambiance. There are a variety of candle dyes and fragrances available in the market, but it is important to use them in the right proportion to avoid any adverse effects.
Finally, safety should always be a top priority when making candles. Always follow the manufacturer’s instructions and take necessary precautions when handling hot wax and other materials.
By following these tips and techniques, you can create stunning candles that are shaped like specific objects or symbols. Whether you’re making them for yourself or as a gift, these candles are sure to impress and add a personal touch to any space.